When you notice signs of water damage on your plaster walls, you must act quickly to prevent further issues. You might see peeling paint, soft spots, or even detect a musty odor. Identifying the moisture source is your first step, but how you dry and repair those walls can significantly influence the outcome. Knowing the proper techniques and materials can make all the difference, especially when it comes to ensuring your walls are protected long-term. So, what should you do next to tackle this problem effectively?
Signs of Water Damage on Plaster Walls

When identifying water damage on plaster walls, look for several key signs. Addressing these signs early can prevent further damage.
- Peeling Paint: Paint can peel or bubble when moisture seeps beneath the surface and degrade the inner layers of the paint and drywall. This indicates that water damage is present and affects the plaster’s integrity.
- Stains or Discoloration: Dark stains or discoloration often appear when water infiltrates plaster walls. These marks indicate moisture has penetrated and could compromise the wall’s structure.
- Soft Spots: Areas of the plaster that feel soft, spongy, or weak to the touch suggest that water has soaked into the material. This will quickly weaken its structure and potentially cause further damage.
- Musty Smell: A musty or damp odor commonly shows mold or mildew growth behind the plaster. Excess moisture promotes the development of these harmful fungi, which can affect indoor air quality.
- Uneven Texture or Bulging: Water trapped in plaster can cause bulging or uneven surfaces. This occurs when moisture is retained, leading to pressure buildup and deforming the wall’s texture over time.
- Hollow Sound: Tapping the wall and hearing a hollow sound indicates moisture has compromised the plaster. This separation suggests that water has caused the plaster to detach from its underlying structure.
- Excessive Moisture: Consistent high humidity or visible condensation on the wall surfaces can lead to water damage. This creates an environment conducive to mold growth and plaster deterioration.
By recognizing these signs early, you can address water damage before it becomes more serious and costly to repair.
Steps to Dry Out Plaster Walls Safely
Drying out plaster walls properly after water damage is essential to prevent long-term issues like mold growth, weakening of the structure, and further deterioration. Taking the proper steps early on can help you preserve your walls and avoid costly repairs. Here are the key steps to dry out plaster walls safely:
- Improve Airflow: Open windows and doors to promote air circulation. Use fans to direct airflow across damp plaster walls for faster drying.
- Use Dehumidifiers: Position dehumidifiers near affected areas to extract moisture from the air and speed up the drying process of your plaster walls.
- Remove Soaked Materials: Remove wet items like rugs, curtains, or furniture from the room to prevent them from retaining moisture and slowing down wall drying.
- Check Wall Saturation: Evaluate how deep the water has gone. Remove damaged plaster sections to enhance airflow and assess hidden moisture damage if needed.
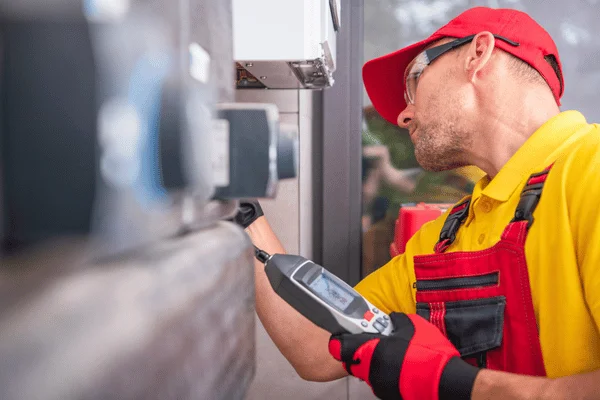
- Monitor Progress: Use a moisture meter to track drying progress and confirm that the walls are completely dry before patching, sanding, or repainting.
Following these steps can minimize damage and restore your plaster walls safely and effectively. Acting quickly and using the right tools will go a long way in preserving your home’s integrity.
Repairing and Repainting Damaged Plaster
- Inspect the Damage: Carefully check for visible cracks, bubbling, or peeling paint. These are common indicators of moisture damage, which must be fixed before repainting to ensure a smooth finish.
- Clean the Surface: Clear away dust, debris, or loose materials around the damaged area. A clean surface ensures the patching compound adheres well, providing a strong foundation for repairs.
- Patch the Cracks: Fill cracks and holes with a high-quality plaster patching compound. Apply it smoothly and feather the edges, blending it seamlessly with the surrounding wall for a professional result.
- Let the Patch Dry: Allow the patched areas to dry completely, following the manufacturer’s instructions carefully. Rushing this step can lead to uneven results and affect the final finish quality.
- Sand the Area: After drying the patch, use fine-grit sandpaper to smooth the surface and even out the patched area. Sanding ensures that the repaired area blends seamlessly with the rest of the wall’s texture.
- Clean Off Dust: Wipe the sanded area with a damp cloth to remove dust so it does not affect the paint. This helps improve primer and paint adhesion, ensuring your wall’s smoother, longer-lasting finish.
- Apply Primer: Use a primer designed explicitly for plaster walls. The primer seals the patched areas and helps ensure even paint application, enhancing paint durability and coverage.
- Paint the Wall: Select a high-quality interior paint and apply it using smooth, even strokes and professional-grade brushes. Let the first coat dry thoroughly before applying a second coat for optimal coverage.
These steps help restore both the look and durability of your plaster walls after water damage.
When to Call a Water Damage Professional

While minor plaster wall damage can be a DIY fix, professional help is needed in some situations. If you notice large areas of bubbling, peeling, or discoloration, these are signs that the damage may run deeper than it appears. Professionals can accurately assess hidden moisture and structural issues that homeowners might overlook.
Recurring signs of water damage, such as persistent damp spots or mold growth, may indicate an active leak. In these cases, expert intervention is necessary to identify and stop the source of moisture.
Another red flag is musty odors or soft spots on the walls—both signs of possible mold or compromised plaster integrity. Repairing such damage without thoroughly drying the affected area can lead to ongoing issues and costly repairs.
Professionals use tools like moisture meters and thermal imaging to detect hidden water and ensure your home is truly dry before repairs begin. If you’re uncertain about the damage or suspect hidden problems, it’s best to consult a specialist.
Calling in a professional not only ensures thorough repairs but also helps protect your home’s structure and your family’s health. When in doubt, trust your instincts and get expert guidance.
Keep Your Walls Dry and Protected

Preventing water damage begins with keeping plaster walls dry. Regularly inspect for leaks, stains, or cracks, and address them promptly. Ensure gutters and downspouts function correctly, directing water away from the foundation to reduce infiltration. In moisture-prone areas like kitchens and bathrooms, install vapor barriers and use exhaust fans to control humidity.
Seal cracks and gaps in your home’s exterior outdoors to prevent water from entering. Use dehumidifiers inside to maintain proper humidity levels when necessary. By taking these preventive measures, you can protect your plaster walls from damage, saving you time and money on costly repairs down the road.
Final Thoughts on Water Damage Remediation
Addressing water damage on plaster walls is essential to maintaining your home’s integrity. You can prevent further issues by recognizing the signs early, drying out the area effectively, and making necessary repairs. Don’t hesitate to call a professional if you suspect structural damage or hidden moisture. These steps will help keep your walls dry and protected, ensuring a safe and healthy living environment for you and your family. Get expert help to restore your plaster walls—contact us today.