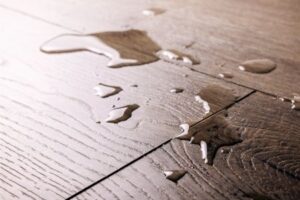
You might not realize how much moisture damage can threaten your wood floors until you notice signs of damage like warping or mold growth. Keeping indoor humidity levels in check isn’t just a preference; it’s vital for the longevity of your flooring. You can proactively protect your investment by using dehumidifiers and monitoring moisture levels.
But what happens when basic measures aren’t enough? Understanding the nuances of moisture management can make a big difference, especially if you’re facing unexpected issues. Let’s take a closer look at why moisture is such a huge deal and why it can cause such damage to wood floors in the home!
Why Moisture Is a Threat to Wood Floors
Moisture can cause wood floors to expand, leading to gaps and uneven surfaces. Over time, small amounts of moisture can cause lasting damage, but proactive steps can preserve their integrity.
- Warping: When moisture causes wood to swell, it creates uneven surfaces and can warp and change the appearance of floorboards and the underflooring itself. This results in unsightly gaps between boards and can make walking uncomfortable. Over time, excessive moisture may cause the wood to lose its original shape.
- Buckling: A more severe form of moisture damage, buckling occurs when the wood expands so much that it lifts off the subfloor. This typically happens when moisture seeps in from above or below, causing the wood to separate and distort. Buckling often indicates significant water damage and is hard to repair.
- Mold Growth: Excess moisture trapped in or beneath wood floors creates ideal mold conditions. Mold spreads quickly, leading to surface damage and potential health risks. It can affect air quality and cause respiratory issues. If ignored, mold growth can severely damage the structure of your home.
- Long-Term Structural Issues: If moisture-related problems like warping or mold are left unresolved, they can weaken the structural integrity of your home. Over time, this can lead to expensive repairs and compromise the foundation, requiring extensive work to restore stability.
Taking early action to manage moisture and prevent these problems will help preserve the beauty and longevity of your wood floors.
Signs Your Wood Floors Have Too Much Moisture
Excess moisture can cause several problems with your wood floors. Here are some common signs to watch for:
- Cupping: This occurs when the edges of the wood rise while the center stays lower, creating a cup or bowl effect on the floor. It’s caused by moisture imbalance, often due to excess moisture trapped beneath the floor.
- Crowning: The opposite of cupping, crowning happens when the center of the wood board rises higher than the edges. This is typically caused by moisture absorption from the top, often due to high humidity.
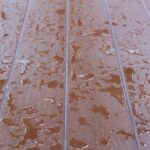
- Discoloration: Moisture can discolor the wood, leading to dark or light patches that can easily stand out against the rest of the flooring. This can signify water damage or mold growth beneath the surface.
- Musty Smell: A musty odor clearly indicates mold or mildew, often caused by excessive moisture. This smell can signal hidden water damage and may affect your floors’ air quality and structural integrity.
If you notice any of these signs, it’s crucial to address moisture issues promptly to maintain the appearance and integrity of your wood floors.
Minor flooring issues and moisture intrusion can lead to significant problems if left untreated. When flooring issues get bad enough, they can affect other structures in the home, including the walls, subflooring, and, in extreme cases, even the foundation.
How to Dehumidify Wood Floors Effectively
To protect your wood floors from moisture damage, identify and fix any moisture sources, such as leaks or spills. Immediately dry wet areas with absorbent towels, or use a wet/dry vacuum for larger spills. If you notice warping or buckling, you may need to replace damaged boards.
Keep indoor humidity levels between 30% and 50%. Using a dehumidifier in areas with wood floors helps reduce excess moisture in the air. Fans also help circulate air, speeding up the drying process, while air conditioning can maintain stable humidity levels.
Proper ventilation is key in moisture control. Open windows or install vents to allow airflow, especially in humid areas. Regularly inspect your floors for signs of moisture damage, addressing any issues immediately to prevent further problems.
By consistently monitoring humidity and addressing moisture issues, you can help preserve your wood floors’ appearance and structural integrity. Following these practices will keep your floors looking great and protect them from long-term moisture damage.
Best Tools and Practices for Humidity Control
Maintaining the proper humidity level in your home is essential for protecting wood floors and ensuring comfort. One of the most effective tools for controlling moisture is a dehumidifier. There are several types to consider:
- Desiccant Dehumidifiers are great for colder environments. They work by absorbing moisture from the air using a drying agent.
- Compressor Dehumidifiers: Ideal for warmer climates, they cool the air to remove moisture and are more energy-efficient.
Another essential tool is a hygrometer, which measures the humidity level in your home. It helps you monitor if your humidity falls within the ideal range. For room humidity management, consider these tips:
- Place a dehumidifier in high-moisture areas like basements or bathrooms to effectively control humidity and prevent wood damage.
- Increase airflow with fans, especially in rooms with limited ventilation, to reduce moisture accumulation and promote drying.
- Ensure windows and doors are correctly sealed to prevent outdoor humidity from entering and affecting indoor air quality.
- To prevent damage, inspect for moisture sources, such as plumbing leaks, excess condensation, or water intrusion.
Using these tools and practices, you can maintain optimal indoor humidity, ensuring your floors and home remain safe from moisture damage.
When to Seek Professional Help for Water Damage
Water damage can escalate quickly if not addressed. If you notice discoloration, damp patches, or persistent moisture despite drying efforts, it’s time to call a professional. Mold can begin to grow within 24-48 hours, posing health risks. Warping or buckling wood floors often indicate deeper moisture problems beneath the surface, which require specialized tools and expertise to resolve.
Additionally, if the water damage is extensive or linked to plumbing or roofing issues, professional help is essential. Professionals can accurately assess the situation, prevent further damage, and implement effective solutions to deal with the current water intrusion issue. Acting quickly can save you time and money, prevent long-term structural damage, and keep your family protected from the effects of mold, mildew, and degraded flooring, among other health and safety concerns.
Protect Your Floors and Home from Moisture
To protect your wood floors and home from moisture, start by monitoring indoor humidity levels. Using a hygrometer helps track these levels accurately. In high-humidity areas, use a dehumidifier to maintain ideal moisture levels and prevent floor damage. Ensure proper ventilation in kitchens and bathrooms by using exhaust fans or opening windows to reduce moisture buildup.
Regularly inspect your floors for signs of moisture damage, such as warping or discoloration, and address them promptly. Applying a protective finish on wood floors adds an extra layer of defense against moisture. Lastly, check your plumbing for leaks, as they can introduce unwanted moisture. Staying proactive and vigilant will help protect your floors and ensure a healthy home environment.
Final Thoughts on Wood Floor and Moisture Damage
You can prevent severe moisture damage by dehumidifying your wood floors proactively. Watch for signs like cupping and discoloration, and use dehumidifiers and hygrometers to maintain ideal humidity levels. If you notice deeper issues, don’t hesitate to seek professional help.
Protecting your floors not only preserves their beauty but also safeguards your home’s overall integrity. Stay vigilant so your wood floors remain in tip-top shape for many years to come! Get expert help to restore your home—contact us today and call us for all your moisture damage concerns.


