Drywall is one of the most common building materials used in homes, but it’s also one of the most vulnerable to water damage. Whether you’re dealing with the aftermath of a plumbing issue, a roof leak, or a flood, drywall water damage can be a serious issue if not addressed quickly and properly. The longer water sits, the more damage it causes—weakens structural integrity, invites mold, and creates unsightly wall stains. Fortunately, with the proper knowledge and tools, you can often handle minor repairs on your own. And when the damage goes beyond DIY territory, knowing when to call in a pro is just as important.
In this comprehensive guide, we’ll walk you through what causes water damage to drywall, how to spot it early, how to repair minor water damage, and how to prevent future issues. You’ll also learn when it’s best to get help from a water damage restoration professional. Whether you’re a handy homeowner or just want to understand your options, this guide has you covered. Let’s jump in and protect your home—starting with the walls that hold it all together.
What Causes Drywall Water Damage?
Water doesn’t need much of an invitation to start wreaking havoc on drywall. The most common sources of water damage on drywall include roof leaks, burst pipes, faulty plumbing, appliance overflows, and flooding. Even small, unnoticed drips behind a wall can slowly seep into drywall, leading to hidden water damage that may not become apparent until it becomes severe.
Poor ventilation or condensation in humid areas, such as basements, can also contribute to moisture problems. The key is to conduct early drywall inspections and respond quickly. Understanding the root cause is the first step to effective drywall repair and preventing the same issue from repeating.
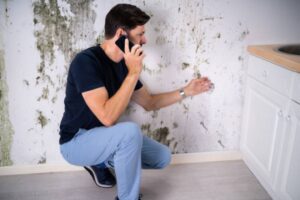
Signs Your Drywall Has Water Damage
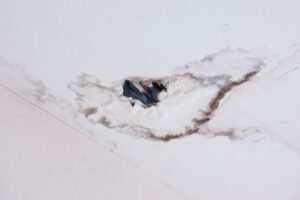
Spotting drywall water damage early makes a big difference in repair costs and effort. Keep an eye out for common warning signs, such as yellow or brown wall stains, which indicate that moisture has seeped through. Bubbling or peeling paint is another red flag, often caused by trapped moisture.
Sagging or warped drywall panels indicate deeper saturation, while a musty odor can signal the formation of mold behind the wall. You may also notice soft spots when pressing on the wall. Regular inspections help you catch these problems early, preventing them from developing into a full-blown drywall repair project.
Step-by-Step Guide to Repair Minor Drywall Damage
Before starting a drywall repair job, ensure the damage is minor—limited to one spot and not caused by ongoing issues such as mold or structural failure. If you’re sure it’s safe to proceed, here’s a step-by-step guide on how to fix this kind of water damage.
Locate and Stop the Water Source
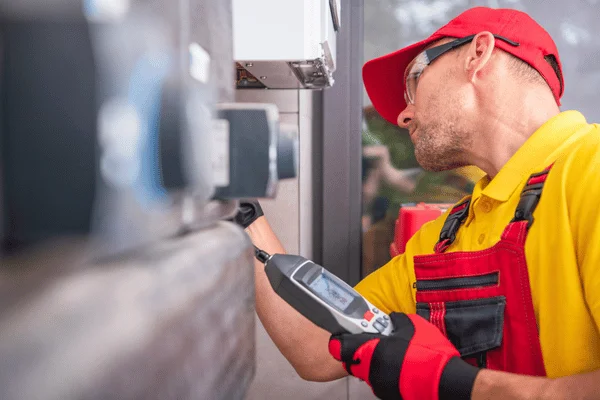
Before any drywall repair begins, you need to address the root cause. Identify the signs of water damage and repair the leak, broken pipe, or faulty appliance causing the water intrusion. Without stopping the water at its source, any repairs will be short-lived. A proper inspection of drywall will also help you determine if there’s lingering moisture inside the wall cavity.
Dry the Affected Area
After the leak is fixed, it’s time to dry everything thoroughly. Use fans, dehumidifiers, and ventilation to ensure no moisture is left behind. Depending on the extent of the water exposure, drying can take anywhere from 24 to 72 hours. Drying out the area helps prevent mold and ensures your drywall repair materials adhere properly.
Cut Out Damaged Drywall
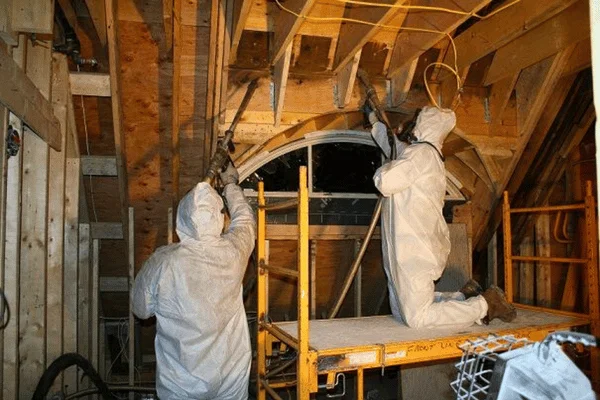
Using a utility knife or drywall saw, cut away the water damaged drywall. Make clean, square cuts around the affected area so the new patch fits neatly. If insulation behind the wall is wet, it should also be removed and replaced. Always wear protective gear during this part of the process—especially if mold is suspected.
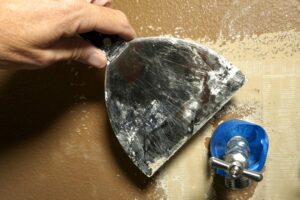
Patch with New Drywall
Once everything is dry and cleaned out, install a new piece of drywall to fill the cut-out section. Use drywall tape and joint compound to blend the edges with the existing wall. Be sure to apply multiple coats of compound and sand between coats for a seamless finish. This step restores the wall’s structure and prepares it for painting.
Sand, Prime, and Paint
After your final coat of joint compound is dry, sand the area smooth. Apply a stain-blocking primer to prevent old wall stains from bleeding through the new paint. Finally, paint the area to match the surrounding wall. If done correctly, your drywall repair should blend in so well that you’ll forget it ever had water damage.
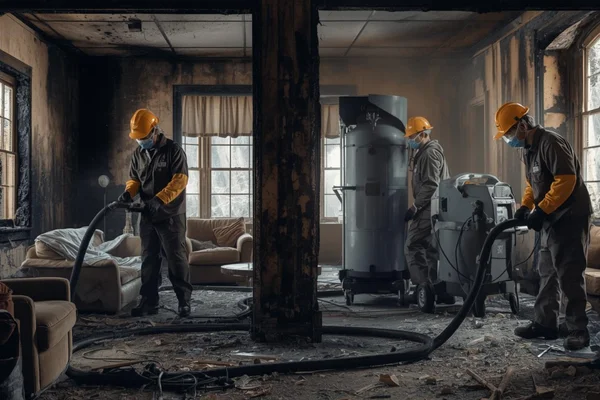
Not every drywall water damage situation can be handled with a utility knife and some spackle. If you spot mold, structural damage, or extensive saturation across multiple walls or ceilings, it’s time to call a professional. Experts in water restoration use moisture meters, perform detailed drywall inspection, and can address issues like black mold, which is hazardous to your health.
They also ensure everything is dried and repaired to code, reducing the risk of long-term problems. When in doubt, professional help saves time, prevents further damage, and protects your home’s safety.
Protect Your Home from Future Drywall Damage
Prevention is just as important as repair. To avoid future water damaged drywall, stay on top of regular maintenance. Check your roof annually for leaks, inspect plumbing fixtures and pipes, and install leak detectors near major appliances. In humid areas, use dehumidifiers and ensure proper ventilation.
Don’t ignore minor signs like wall stains or musty odors—these can point to a bigger problem brewing behind the scenes. Periodic drywall inspection helps you stay ahead of damage before it becomes costly. Preventative care goes a long way in protecting your walls and keeping drywall repair off your to-do list.
Final Thoughts on Fixing Water Damage to Drywall
Fixing drywall water damage doesn’t have to be overwhelming. With a bit of know-how and attention to detail, many minor issues can be handled quickly and effectively. But when the damage runs deep or mold is involved, it’s smart to bring in the pros.
At SS Water Restoration, we specialize in helping homeowners fix this sort of water damage with precision and care. From inspection to complete restoration, our drywall team is ready to help you get your walls—and your peace of mind—back to normal. Don’t wait until the damage spreads. Contact SS Water Restoration today for a fast, reliable solution.