Orange mold in shower areas and on wood surfaces is a common but often misunderstood household issue. Unlike the more familiar black or green molds, orange mold has a distinct appearance and can be more challenging to manage if left unchecked.
This type of mold thrives in damp, poorly ventilated environments and can spread quickly under the right conditions. Before cleaning it, it’s essential to understand what causes orange mold in the shower as well as how it behaves, and the best strategies for safe and effective removal. Mold can be more than just an eyesore, it can damage materials and surfaces and can even make you and your family sick! So, it is always a good idea to deal with mold remediation as soon as you see the first signs.
Now is the perfect time to learn more about orange mold and how to eliminate it, so let’s dive in now!
What Is Orange Mold?

Orange mold is a type of fungus that can often be mistaken for mildew or other growths. You’ll typically find it thriving in damp areas like bathrooms, on wood surfaces, or even on food. Understanding what it is and where it grows is essential for effective removal.
Is It Mold, Mildew, or Something Else?
Noticing unusual growth in your bathroom, such as mold, can raise concerns about what you’re dealing with. While it may resemble mildew or other fungi, orange mold has distinct characteristics, including a bright hue and often a thicker, slimy texture. It thrives in warm, damp environments, usually indicating underlying moisture or ventilation problems.
Understanding the nature of orange mold and the conditions that support its growth is essential for effective removal and prevention. With this knowledge, you’ll be better equipped to deal with infestations, particularly when dealing with orange mold in the shower.
Where It Commonly Grows (Bathrooms, Wood, Food, etc.)
Orange mold in bathrooms and other humid areas can spread more than most people think. Here are the most common places where this mold is likely to develop:
- Bathrooms: Frequently found in shower corners, on tiles, and around faucets—anywhere moisture builds up and can linger.
- Wood Surfaces: Wood exposed to leaks or high humidity, such as cabinets, beams, or basement furniture, is especially vulnerable to orange mold.
- Basements and Attics: Poor ventilation and damp conditions in the home make these areas ideal for mold growth and spread as well.
- Food: Certain fruits and vegetables stored in moist environments can also develop orange mold that comes in from the surrounding environment.
Understanding these common locations is the first step in learning how to remove orange mold effectively before it spreads further.
Is Orange Mold Dangerous?
In general, orange mold is not dangerous so long as it is not consumed or inhaled in large quantities. However, some people may experience allergic reactions or respiratory issues upon exposure to orange mold, so knowing when to worry is vital. If you’re unsure about handling it yourself, don’t hesitate to seek professional help, as that is usually the best and safest option for orange mold remediation and removal.
Health Risks of Orange Mold Exposure
Orange mold may appear less concerning than black mold, but its impact on your health can be just as serious, especially in damp areas like the shower. Prolonged exposure can affect anyone, but those with pre-existing conditions or weakened immune systems are at greater risk. Here are some common health issues linked to orange mold exposure:
- Allergic Reactions: Sneezing, coughing, itchy eyes, and nasal congestion.
- Worsened Respiratory Issues: Asthma attacks or breathing difficulties.
- Mycotoxin Exposure: Fatigue, headaches, and trouble concentrating.
- Immunity Risks: Higher risk for infections in children, seniors, and ill individuals.
- Air Quality Decline: Even invisible spores can affect indoor environments.
When to Worry and When to DIY
Depending on the severity, dealing with orange mold in your shower and other parts of your home can be manageable. If it’s a small patch in your shower, DIY cleaning with vinegar, baking soda, or a commercial product might be enough. Just be sure to wear gloves and a mask for protection. However, if the mold keeps returning, spreads across large areas, or shows up in wood or behind walls, professional help is a safer option.
Health concerns also matter—anyone with allergies, asthma, or weakened immunity should avoid prolonged exposure. Knowing how to remove orange mold and when to call in experts can help protect your home and your health from further damage.
What Causes Orange Mold in the Shower or on Wood?
Orange mold thrives in areas with poor ventilation and high humidity, making your shower and damp wood prime targets.
Poor Ventilation & Humidity
Orange mold thrives in areas with high humidity and poor ventilation. Moisture lingers in the bathroom without proper airflow, creating a perfect breeding ground. Using exhaust fans, opening windows, or leaving the door open after showers helps reduce humidity and prevent mold growth. Address leaks and use a dehumidifier in damp areas for better air circulation.
Soap Residue and Organic Build-Up
Soap residue and organic materials, like hair and skin cells, can contribute to orange mold growth. These substances create an environment that attracts bacteria and fungi. Regularly cleaning and wiping down shower surfaces and wooden areas prevents mold. A daily cleaner can break down soap scum, while damp cloths help maintain cleanliness to avoid mold issues.
Damp Wood & Hidden Moisture
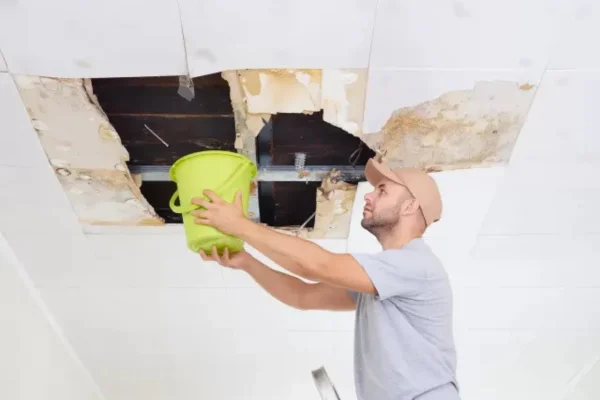
Hidden moisture in wood and areas prone to water leaks create ideal conditions for orange mold. Damp wood traps moisture and encourages mold growth, especially behind tiles or wooden beams. Regularly inspect for leaks, improve ventilation, and seal wooden surfaces. Understanding what causes orange mold can help prevent its spread by addressing hidden moisture sources early.
How to Get Rid of Orange Mold in the Shower
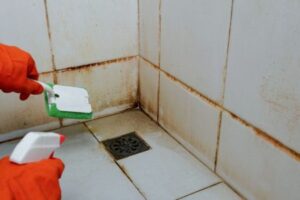
If you’re dealing with orange mold in your shower, it’s important to act quickly to prevent further growth. Follow these steps for effective removal:
- Gather supplies: You’ll need a scrub brush, rubber gloves, a spray bottle, and a mold-killing solution, such as vinegar or a store-bought cleaner designed for mold removal.
- Clear the shower: Remove any items from your shower to give you full access to the affected areas.
- Apply the cleaner: Spray the affected areas with your chosen mold-killing solution.
- Wait: Let the solution sit for 10–15 minutes to break down the mold.
- Scrub: Wear gloves and scrub the moldy spots with a scrub brush, paying attention to grout lines and corners.
- Rinse: After scrubbing, rinse the area thoroughly with hot water to remove any residue.
How to Remove Orange Mold from Wood Surfaces
To effectively remove orange mold from wood, start by gathering your supplies: gloves, a soft brush, mild detergent, water, and white vinegar. Mix warm water and detergent in a bucket, then gently scrub the affected area with the brush, rinsing frequently. After scrubbing, rinse the surface with clean water and dry it thoroughly.
If the mold persists, mix equal parts vinegar and water in a spray bottle, apply it to the mold, and let it sit for 10 minutes. Scrub again, rinse, and dry the surface. To prevent future growth, ensure the wood stays dry and well-ventilated.
When to Call a Mold Remediation Specialist
If you notice extensive orange mold growth or persistent moisture issues, consider calling a mold remediation specialist. Professional inspections can identify underlying problems that DIY methods might miss.
Signs the Infestation Is Beyond DIY
Recognizing when an orange mold infestation exceeds DIY solutions is essential for your safety and health. Here are some signs to watch for:
- Persistent Mold: If mold keeps returning despite your best cleaning efforts, it’s likely deeper than surface-level cleaning.
- Large Coverage: More than 10 square feet of mold indicates a bigger issue that likely impacts interior walls and flooring structures.
- Musty Odor: A persistent and strong musty smell often means mold has been hiding within walls or fixtures for some time already.
- Health Issues: Respiratory problems, allergies, or skin irritations after mold exposure are serious red flags that need immediate action.
- Uncertainty: Contact professionals if unsure about the mold type you are dealing with or are unsure you can remove it safely.
Trust your instincts—if the situation feels overwhelming, it’s best to call in the experts to ensure your safety and effective mold removal.
Importance of Professional Mold Inspection
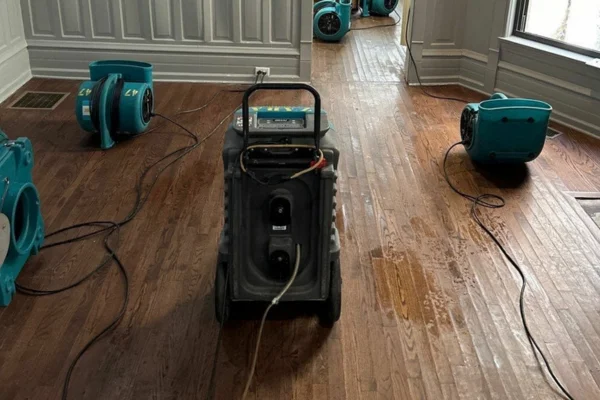
When orange mold becomes a persistent problem, professional mold inspection is crucial. While DIY solutions can help with small mold issues, experts have the tools and training to accurately assess the extent of an infestation. Mold can hide in hard-to-reach areas like behind walls or under floors, making it difficult for homeowners to spot. Moreover, professionals can identify the specific type of mold, ensuring it’s handled safely.
If mold is affecting your health or environment, a mold inspector can offer a thorough evaluation and provide a remediation plan to ensure it doesn’t return. Professionals also check moisture levels to prevent future mold growth, protecting your home from ongoing damage. Calling your local mold remediation experts can save you time, money, and health risks, ensuring your home is safe and mold-free.
Final Thoughts on Orange Mold Remediation
Tackling orange mold in the shower and on wood surfaces is manageable with the right tools and techniques. Wear gloves and use a mold-killing solution or a vinegar mixture for effective results. Regular cleaning and drying can help prevent future growth. If the mold persists or you notice extensive damage, don’t hesitate to call a mold remediation specialist. Keeping your space mold-free guarantees a healthier environment for you and your family. Take Control of Your Home’s Health. Call Today for Orange Mold Removal Solutions That Work.
Frequently Asked Questions
1. Can Orange Mold Be Prevented From Returning After Removal?
2. What Cleaning Products Are Most Effective Against Orange Mold?
3. How Can I Tell if the Mold Is Orange Mold?
4. Will Vinegar Kill Orange Mold Effectively?
5. Can Orange Mold Affect Pets or Animals?


