Dealing with excess water on wood floors can be a serious concern, especially when left untreated and undiagnosed.
Moisture can warp, stain, or even rot your beautiful flooring if not addressed quickly. In this guide, we’ll walk you through practical and effective steps to remove moisture from wood floors and help prevent long-term damage. Whether from spills, humidity, or leaks, knowing the proper techniques can save you time, money, and stress.
To remove moisture effectively, it’s essential to understand how to dry hardwood floor surfaces properly. Moisture removal in wood floors requires prompt action. Use dehumidifiers for moisture control for wood floors. Learn how to deal with water-damaged wood floors to prevent warping, mold growth, and costly repairs.
Let’s take a closer look now!
The Importance of Removing Moisture from Wood Floors
Removing moisture from your wood floors is essential to prevent damage that can compromise their beauty and integrity. Taking action now can save you from costly repairs later.
Why Moisture Damage Can Be Detrimental to Your Wood Floors
Moisture poses a serious threat to the longevity and appearance of wood floors. When water seeps in, it can cause boards to swell, warp, or cup, distorting the surface and weakening the structure over time.
Mold and mildew thrive in damp conditions, contributing to unpleasant odors and potential health concerns. To minimize damage, it’s crucial to act swiftly: ventilate the area, use a dehumidifier, and identify any leaks.
Delaying a response can escalate repair costs or even lead to the total replacement of the floor. Routine checks and fast cleanup of spills will go a long way in preserving your floors’ beauty. With consistent care, you’ll safeguard your investment and ensure your flooring lasts for many years to come.
Long-Term Effects of Moisture on Wood Flooring
Prolonged exposure to moisture can gradually compromise the structural integrity of wood flooring. As wood absorbs water, it expands, often leading to buckling, splitting, or the formation of noticeable gaps between planks.
These changes not only damage aesthetics but also introduce safety issues, such as uneven surfaces or trip hazards. Moist environments can also harbor mold and mildew, threatening indoor air quality.
Unfortunately, once moisture has penetrated deep into the floorboards or subfloor, repairs become more complicated and costly. Preventative action, such as controlling humidity and fixing leaks, is your best defense against these issues.
By addressing moisture concerns early, you preserve both the form and function of your floors, saving time, money, and stress in the long run.
How to Safely Remove Moisture from Your Wood Floor
When it comes to removing moisture safely from your wood floor, having a clear step-by-step guide can make all the difference. Let’s explore these essential steps and tools to protect your flooring.
Step-by-Step Guide to Drying Wood Floors
Discover expert tips for efficiently drying hardwood floors, including effective methods for removing moisture from wood floors. Discover how to deal with water-damaged wood floors and ensure proper moisture control for wood floors to prevent lasting damage. Remove moisture quickly to protect and preserve the beauty and structural integrity of your hardwood.
Drying your wood floors efficiently after a spill or flood is key to preventing damage. Follow these steps:
- Blot Immediately – Use clean, dry towels to soak up as much surface water as possible.
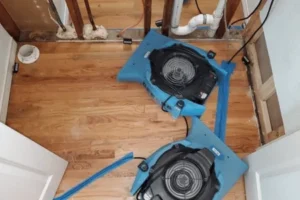
- Use Fans – Position fans strategically around the area to enhance airflow and accelerate evaporation.
- Set Up a Dehumidifier – Reduce humidity in the room to help draw moisture from the wood.
- Monitor Moisture Levels – Use a moisture meter to track progress (target under 12%).
- Air Dry Thoroughly – Leave floors to dry fully for several days, monitoring as needed.
Tools and Equipment You Will Need for Effective Moisture Removal
Having the right tools makes moisture removal faster and more effective. Here’s what you’ll need:
- Wet/Dry Vacuum – Efficiently removes standing water from wood floors before deeper moisture sets in.
- Absorbent Towels or Cloths – great for blotting out damp patches and wiping away residual moisture from surfaces.
- Dehumidifier – Reduces room humidity, allowing excess moisture to escape from the wood more quickly.
- Electric Fans – Boost airflow and ventilation to speed up the drying of damp flooring.
- Moisture Meter – Accurately measures wood’s moisture level to track drying progress and detect hidden dampness.
- Protective Gear – Safety essentials like gloves and masks shield you from mold, debris, and allergens during cleanup.
Preventing Future Moisture Issues on Wood Floors
Let’s explore some key tips to prevent future moisture issues and maintain the integrity of your hardwood.
Key Tips for Moisture Control and Prevention
Moisture control is key to preserving wood floors. Use these simple yet effective tips to minimize risk, maintain your appearance, and prevent long-term damage.
- Use a dehumidifier in humid climates to control indoor moisture levels. Ensure good ventilation by opening windows or using exhaust fans in damp rooms.
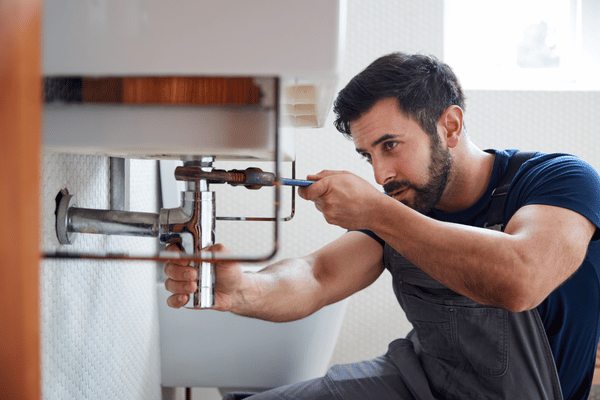
- Inspect for leaks in plumbing and windows, and repair them promptly.
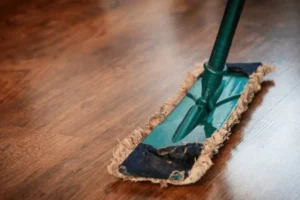
- Clean with a damp mop, never soaking wet, and dry immediately after mopping.
- Wipe spills quickly to prevent liquid from seeping into the wood.
- Install a moisture barrier beneath new flooring if possible.
- Maintain steady indoor temperatures to prevent humidity fluctuations that can cause warping and other damage.
Best Practices to Maintain Dry Hardwood Floors
Preserving your flooring begins with consistent care and preventative habits:
- Inspect appliances and pipes for leaks and address any issues promptly.
- Place area rugs or mats at entryways and kitchens to absorb moisture tracked in from outside.
- Run a dehumidifier during rainy or humid seasons to reduce airborne dampness.
- Open windows or use exhaust fans to ventilate and decrease indoor humidity.
- Clean spills with a dry cloth instead of using a wet mop.
- Avoid overwetting floors during cleaning routines.
By implementing these habits, you’ll strengthen your strategy for drying hardwood floors efficiently and prevent future issues.
How Humidity Affects Wood Floors and How to Combat It
Humidity can significantly impact wood floors, causing them to swell, warp, or develop cracks.
To prevent damage, maintain indoor humidity between 30% and 50%. Use a dehumidifier, especially during wet seasons, and ventilate rooms by using fans or opening windows. Regularly inspect for plumbing or window leaks and seal them right away.
Ensure insulation and vapor barriers are functioning correctly. For long-term protection, install a moisture barrier under new flooring. These strategies support adequate moisture removal, helping to keep your wood floors strong, stable, and beautiful.
When to Call a Professional for Moisture Removal
Knowing how to dry hardwood floors efficiently and remove moisture after leaks can go a long way in preserving your home’s flooring. Moisture removal in wood floors is essential to prevent warping. With expert guidance and assistance on moisture control for wood floors and how to deal with water-damaged wood floors for long-lasting protection and restoration.
If you notice persistent warping, buckling, or discoloration in your wood floors, it’s time to contemplate calling a professional. Recognizing the signs early can make all the difference in preserving your floors.
Signs That Your Wood Floors Need Expert Attention
Knowing when to seek expert help can be the difference between a quick fix and a costly renovation. Keep an eye out for these warning signs that suggest deeper problems and the need for professional evaluation, especially when practicing proper moisture control for wood floors:
- Persistent Dampness – Ongoing moisture that doesn’t dry out may signal hidden water damage.
- Warped or Buckled Boards – Visible distortion typically indicates swelling caused by moisture intrusion.
- Musty or Moldy Odors – A strong scent can indicate the presence of mold growth beneath the surface.
- Dark Spots or Staining – Discoloration often indicates that water has penetrated the wood, causing it to become stained.
- Gaps Between Boards – Wood expansion and contraction from moisture can separate planks.
- Spongy or Soft Areas – A sign that the subfloor might be deteriorating from trapped moisture.
Why DIY Methods May Not Always Work for Severe Moisture Damage
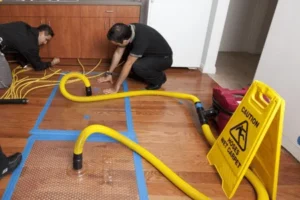
DIY fixes may help with minor spills, but they often fall short when the damage is extensive and involves moisture. Fans and towels may dry the surface, but hidden moisture within the subfloor can lead to mold growth and long-term damage. Signs such as buckling, cupping, or deep discoloration typically indicate that the issue has progressed beyond simple home solutions.
Professionals have the right tools to locate, measure, and extract trapped moisture. They also address structural repairs and recommend preventative strategies. Trying to DIY severe damage could prolong the problem and raise costs. When water damage is extensive, expert help isn’t just a luxury—it’s a necessity.
Final Thoughts on How to Dry Hardwood Floors
To quickly remove moisture from your wood floors to prevent damage.
By using absorbent towels, fans, and a dehumidifier, you can effectively lower humidity levels and protect your floors. Monitor moisture levels with a meter, ensuring they remain below 12%. Remember, taking proactive steps now can save you from costly repairs later. If the situation seems overwhelming, don’t hesitate to call a professional for assistance. Your floors will thank you!
Stop the damage early! Our moisture removal services can restore your floors. Reach out now for a personalized assessment and tailored moisture solutions.
Frequently Asked Questions
1. Can I Use a Dehumidifier on Hardwood Floors?
2. How Long Does It Take for Wood Floors to Dry?
3. Will Moisture Damage My Wood Floor Finish?
4. Can I Refinish Wood Floors After Exposing Them to Moisture?
5. What Are Signs of Hidden Moisture in Wood Floors?